
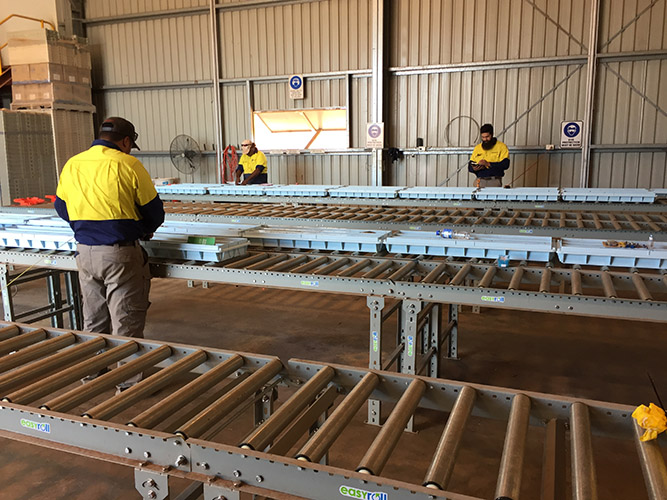
A few years back, a core shed kitted out with roller racking was almost considered a luxury.
Today, on our travels around many of Australia's mine sites, it's becoming increasingly rare to see a core shed without it.
For almost all miners and a growing number of explorers, it’s become a no-brainer from both a safety and core-handling efficiency aspect.
The request goes to the mine manager for space for the geos to do their work and inevitably, you inherit that ‘old shed’ or ‘space between those two containers’. Cheers!
However, we know this is arguably one of the most important parts of the mining and exploration process.
So how do you make it work?
Good news?
You want to make sure the budget you’re allocated is efficiently utilized so you come out at the end with a project you're proud to be part of.
We're happy to help you achieve this.
We want to talk you through the design process (and how other mine sites have used the most basic of facilities), how to maximize the footprint you have now, and how at the end of the project you will significantly reduce your core-logging backlog.
Let's start with the questions you need to answer when designing your core shed:
-
Got a 100% accurate footprint measure of the working area?
-
Got a sketch or drawing using standard components wherever possible?
-
Have you calculated the metres along the logging section of racking – will this be enough for present and future expansion plans?
-
Have you calculated how many rollers you'll need per metre of racking?
-
How many support legs do you need per section?
-
Need anti-fatigue matting to increase efficiency?
-
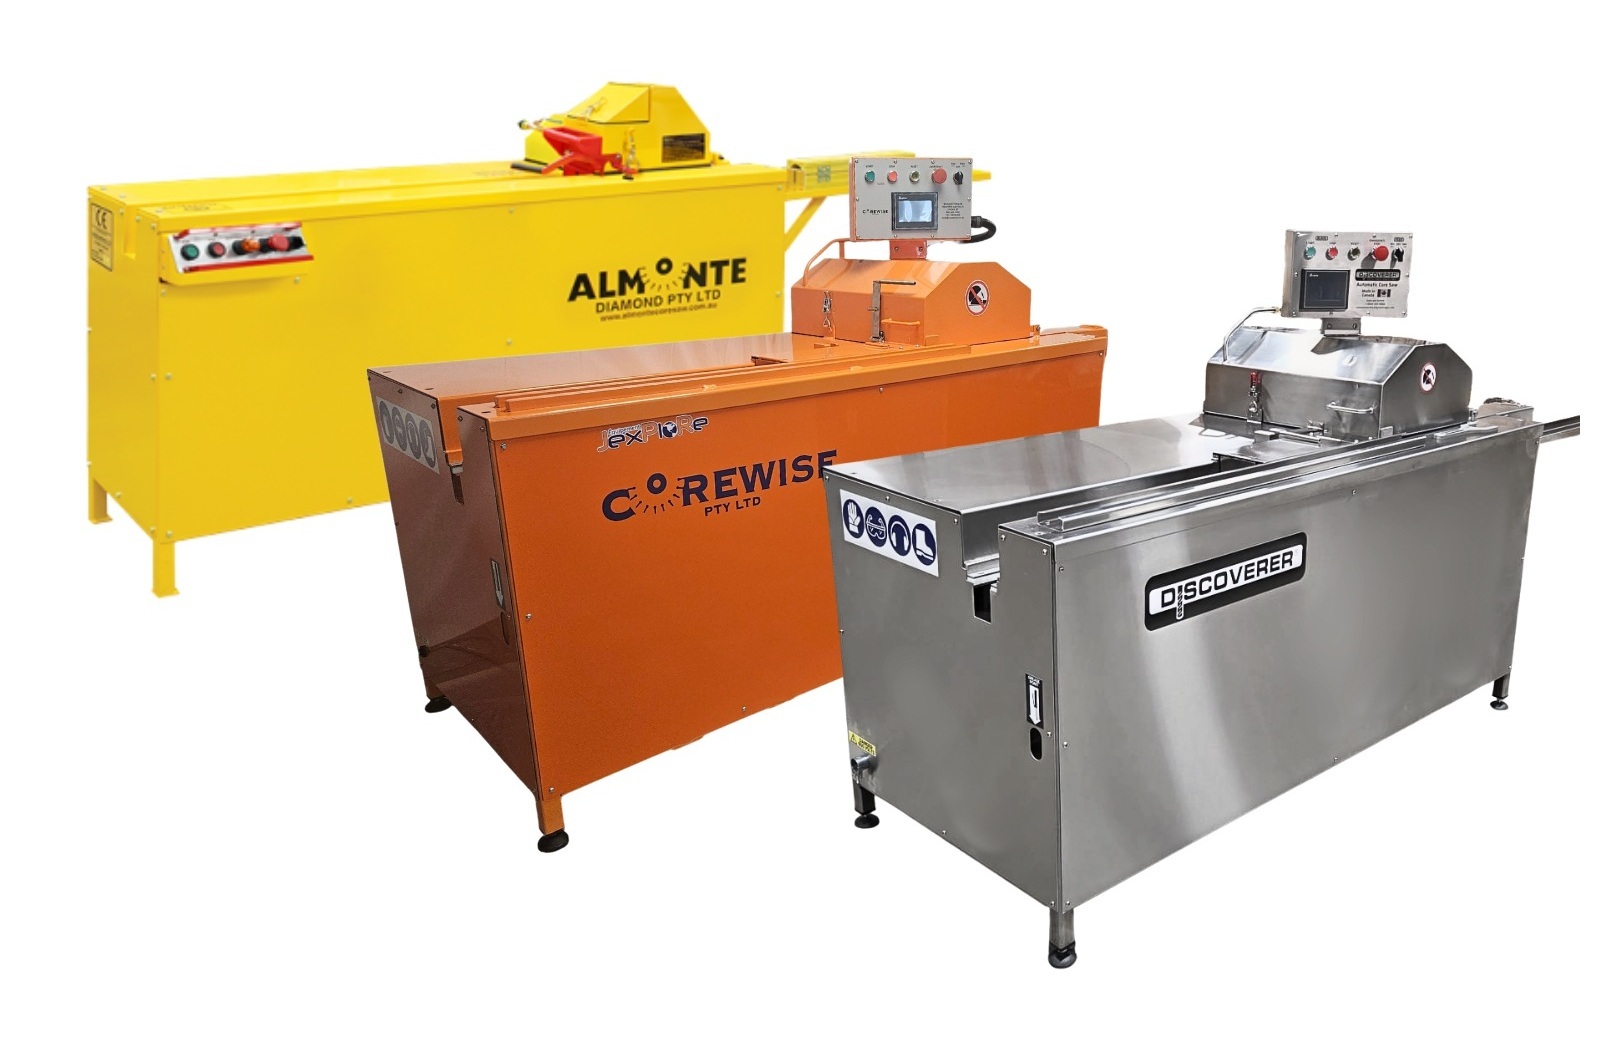
Can your core saw be easily accessed for servicing?
The most common questions answered…
How many rollers do you need per metre?
As standard we suggest putting rollers every 75mm apart.
However, it’s largely dependent on which way you log the core and move the trays along the racking.
If the core trays are only going to be logged and moved along parallel with racking then you can get away with putting the rollers at 150mm centres; additional rollers can be easily retrofitted.
If you plan on moving the trays sideways (long side of the tray leading) or at a 45-degree angle along the racking, then it’s recommended that you have the rollers at 75mm centres.
|
Trays Parallel to Racking
|
Trays Sideways on Racking
|
How many support legs do you need per section?
If the trays will be moved parallel with the racking, we suggest legs at the end of every 3m straight section.
However, if you plan on moving trays sideways, due to more trays/more weight per metre of rack, it's highly recommended to have an additional support leg in the centre of every 3m section.
Think of 7 trays running sideways per 3-metre section equally approx 315kg versus 3 trays running parallel per 3-metre section equally approx 135kg (based on core tray weighing 45kg).
Where do you start with your workflow?
There are very few geologists or field personnel that create core shed workflows everyday.
We’ve had the privilege on a weekly basis to see and design every type of core shed for our customers. So we know what to avoid and what could prove costly if overlooked.
It all starts with a sketch of your floor plan with accurate measurements. If you’ve got a computer-drawn plan of your shed, even better.
We can use any drawing type, as long as the measurements are accurate.

Example of a client plan
How do you decide what you do and don’t need for your core shed?
It’s quite rare to see similar core sheds.
Everyone has different footprints and budgets to work with.
It's always about how we can maximise the efficiency of the journey of a core tray from initial input, through the logging, photography and core cutting stages, and out the other end.
To maximise the speed of commissioning your core shed and budget, we recommend sticking with standard components wherever possible.
Here’s an infographic of the standard components:
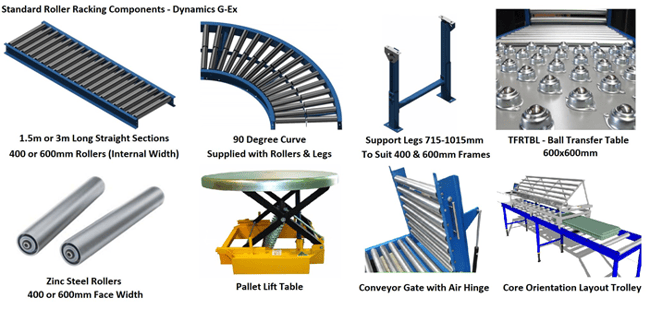
Typically our most popular core shed size is the 600mm width rollers, as this offers the flexibility to run your core trays lengthways or sideways without becoming a work, health and safety (WHS) risk.
However, if the budget is tight and you'd like to look at the 400mm option, you can expect this system to typically cost between 5-10% less than 600mm system.
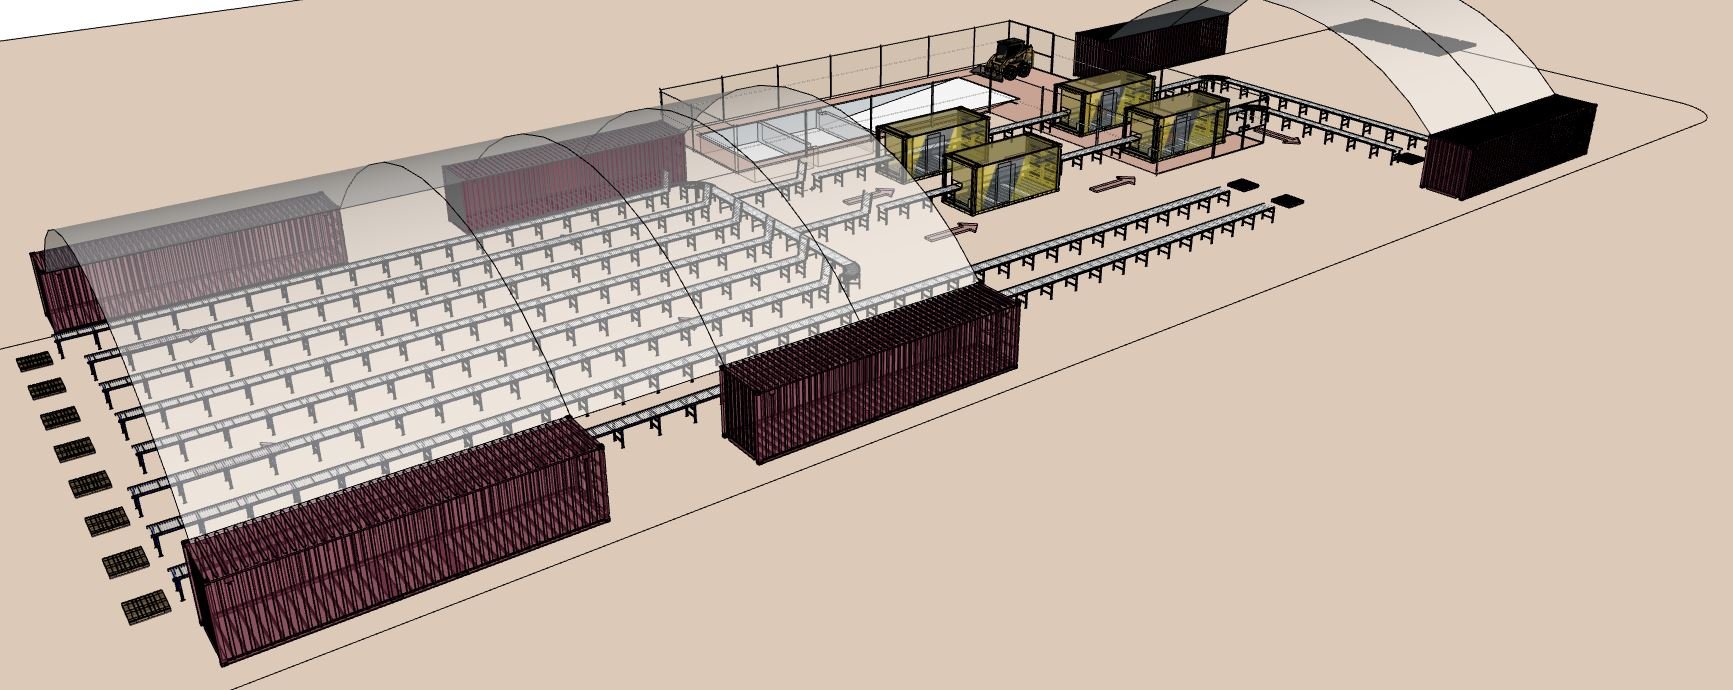
Now, let’s look at some concept ideas.
Version 1 shows a 20 x 10m core shed or footprint area.
It shows the option of a single entry, leaving enough room between the end of the racks to fit a forklift, or a multi-entry shed (open-sided entry).
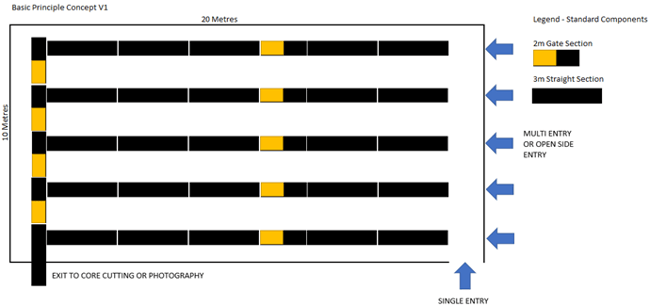
We have used standard 3m straight sections and standard 2m gate sections.
We can custom-size these lengths, but due to the extra labour involved in cutting them down, the cost of getting a shortened length of the straight section is the same whether it is 3m or 2m long.
Bottom line: stick to standard components where possible.
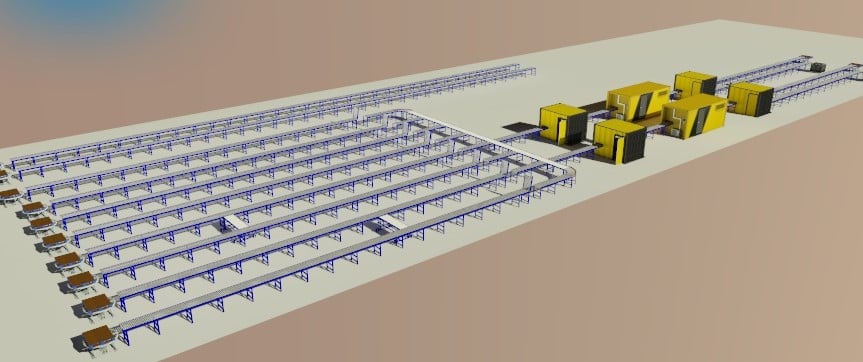
So what are the other layout options to think about?
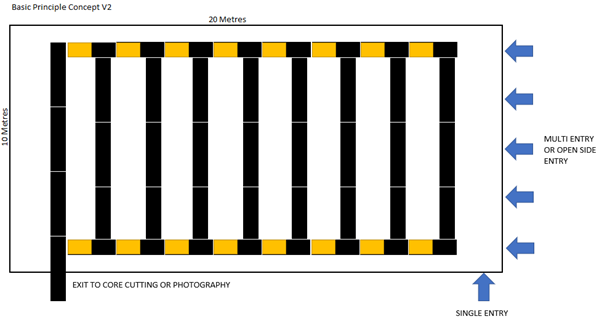
Let’s look at Version 2. Same shed, same entry options.
The decision behind which design is best comes down to the cost of the system and how many trays you will be able to log at any one time?
Let's do the calculations.
Version 1 equates to:
Racking = 96 Metres
Logging Area = 85 Metres
600mm Wide Racks. 1.4 Metre Wide Aisles
Version 2 equates to:
Racking = 108 Metres
Logging Area = 64 Metres
600mm Wide Racks. 1.2 Metre Wide Aisles
In simple terms, more racking = higher cost; less logging area = larger logging backlog and fewer trays logged at any one time.
Hopefully, this brief exercise has shown that, in principle, Version 1 design is our recommended way to build your core shed, as it gives less racking but a larger logging area.
Don't forget that you may have unaccounted factors in your situation as well.
If you have any more questions or you want to get started on your core shed, just reach out to the team and we'd be happy to help!
Spencer Dormer
My goal is to empower Geologists & Field Techs to make more informed decisions through providing unbiased and insightful thought leadership for the industry worldwide.