
The ultimate guide to great core shed design! From economics to ergonomics...
You've been given the job to work out what you need for the gravity conveyor roller racking setup for your Core Shed or the 'Core Shack' as it's known in some parts of the world.
How do you produce plans and come back to your management team with costings...?
Where do you start?
If we were to take you inside Dynamics offices, any day of the week, there's a very high chance you'd catch one of our Geological Product Specialists working on such a project.
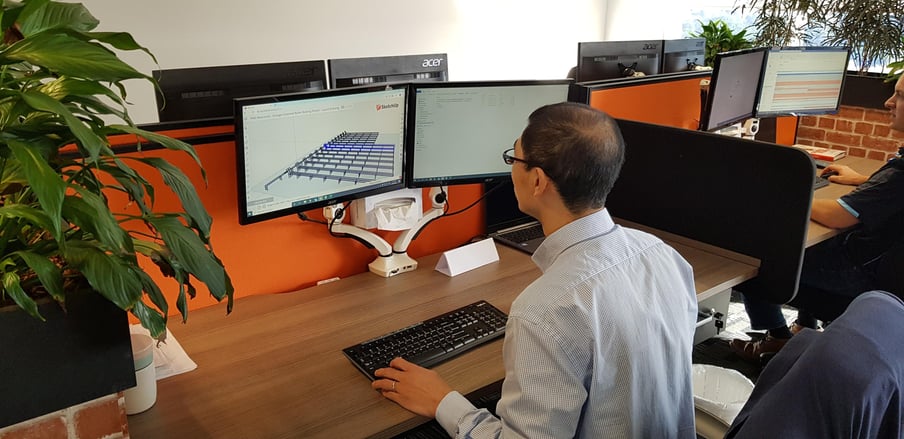
In fact, planning a complete core shed fit-out is something they really enjoy.
Most of these guys have either worked in core sheds themselves, or have 10+ years experience assisting clients through this process.
From Africa to America, Asia to Europe, and of course, on the home turf here in Aussie.
We have manufacturing facilities in Australia & North America, for global supply.
How does this help you?
Before you start anything on this journey, the first thing you should know is that we offer a complimentary design service.
Having the inside knowledge and all the standard component parts loaded into our drawing programs gives you a huge head start.
We've seen so many companies investing significant amounts of time into it, only to realise they'd missed some vital steps in the process.
Then the concept they've created has to be completely or partly re-engineered.
By reaching out to us at the start of your journey will mean you'll remain in control all the way along.
Impress the boss by producing professional plans, walk-through videos and exact costing really easily.

How do I start the process right now?
It all starts by getting educated, and that's where this article is going to help a lot!
Most people want to learn a bit more about the product, get comfortable that it's right for you, and generally get a few more questions answered.
So let's get rolling (pun intended!).
Part 1: The Components of Roller Racking
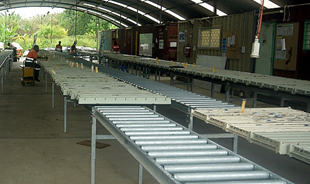
Straight Roller Table Sections
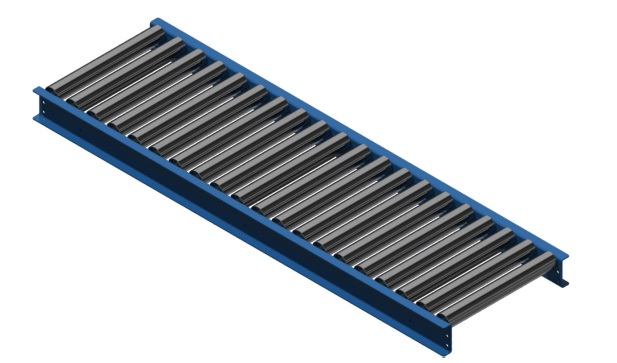
The Straight Roller Table Sections come as stock standard in 1.5m or 3m lengths.
Build your logging area with these in parallel rows.
If you can't fit an exact multiple of 1.5 or 3m length within your footprint, these lengths can be cut down to custom sizes.
Due to labour involved in reducing the length of a 3m section, there is no cost advantage/disadvantage of a shorter customised length.
Obviously, you'll save a few dollars by needing less rollers.
TIP: To join one straight section to the next, it's simply a matter of placing the support leg at the join and bolting them together for a continuous flush finish, as shown below.
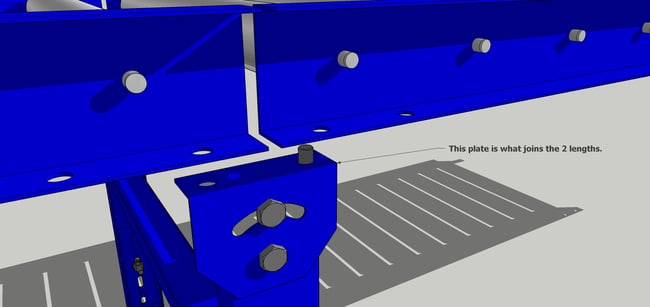
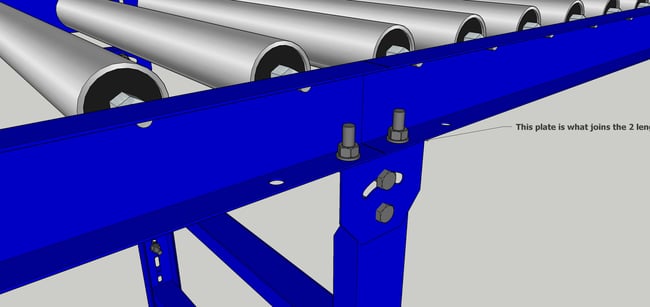
This is an important feature as many mine sites are now rolling Core Logging Trolleys or Core Photography Frames along the top section of this C channel.
Not all roller racking comes with this flush finish; some have a sizable gap between one straight section and the next, which causes equipment to derail or be lifted across to void.
Zinc Steel Rollers
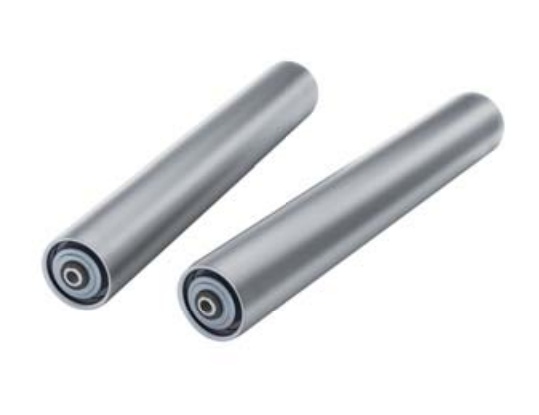
These are Heavy Duty Zinc Steel rollers that slot into the straight sections, with a spring loaded centre axle.
They come in two stock standard widths of 400 and 600mm.
Mine sites will use 600mm 90% of the time.
The holes for these along the straight sections are situated at every 75mm centres.
So if you want half the number of rollers, you can situate these at every other hole, giving you roller at every 150mm centres.
Typically if you log the tray 'side-on' to where you stand (parallel to the racking), 150mm should do the job.
If you log 'end-on' to where you stand (90° to the racking), it's best to for 75mm centre rollers to ensure the tray is stable and supported on the racks.
|
 |
Trays Logged End-on
|
The biggest regret we see people have is they order half the number of rollers and then change the way they log.
Or realise they don't have flexibility in the way they log.
So, if the budget allows it, we always recommend rollers every 75mm.
Tony Lennox, Expert Tip: Back in the day I would order rollers every 75mm, and remove half of them in the high traffic areas, that meant I had a load of spares to swap out whenever they needed replacing.
Adjustable Height Support Legs
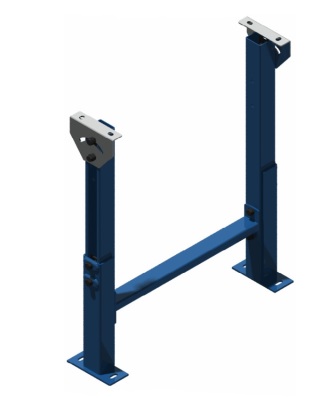
Making sure you've got heavy duty support legs, is probably one of the most fundamental requirements of a system that's going to last for years.
You really don't want these to fail as the weight on them is significant.
To lose the contents of a core tray is never good. Worse is if the system collapses you can seriously maim an employee.
You can get support legs, shown below, that has a single grub screw that is tightened from the outer tubing onto the face of the inner tubing.
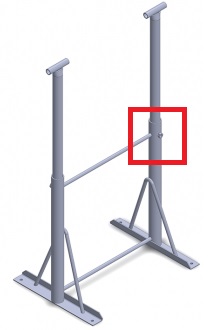
With continual use, tightening these legs has to be performed regularly to save the entire section dropping.
These screws are easily over-tightened, they break, and sites end up screwing them together with tek screws, losing their adjustable feature.
This video shows how Dynamics support legs work where you can set and forget, whilst eliminating a serious potential safety hazards for your team.
The Dynamics adjustable support legs can be raised and lowered between 715mm to 1015mm. The optimal working height for roller racking we recommend is 900mm high.
When the trays will be moved parallel with the racking, we suggest legs at the end of every 3m straight section.
However if you plan on moving trays sideways, due to more trays/more weight per metre of rack, you will need an additional support leg in the centre of every 3m section.
Practical Example:
7 trays running sideways per 3-metre section equally approx 315kg verses 3 trays running parallel per 3-metre section equally approximately 135 kg (based on core tray weighing 45 kg).
You can do your own sums.
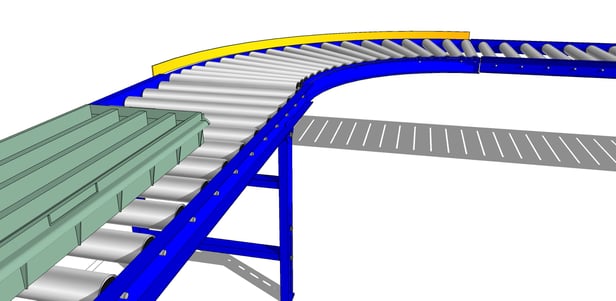
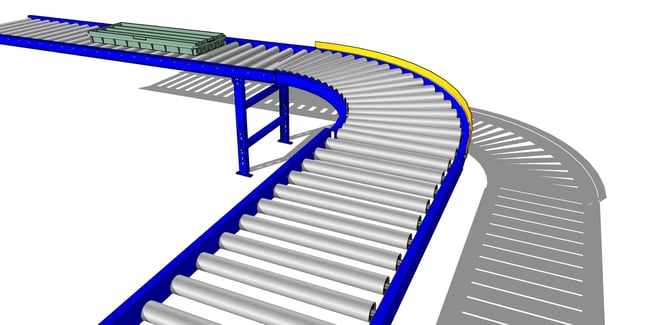
Curves or 90° Angles
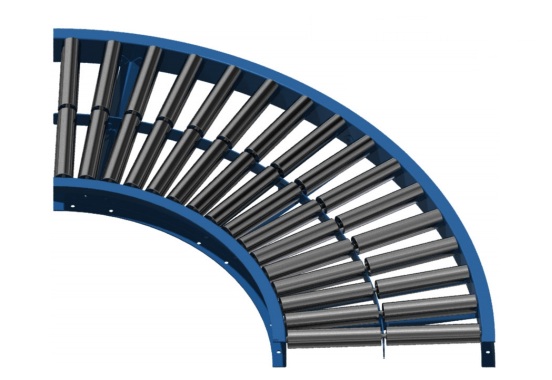
When should you use curves and when should you use 90° angles in your design?
Both components have their place in the design.
For example, one design we recently completed is at Fosterville Gold Mine in Victoria.
Their reason for having curves was so that a single operator could move multiple trays along the racking at once, and the design had a safety rail around the curve.
By pushing the rear tray that 'convoy' of trays would roll smoothly down the racks and around the curve right up to their Auto Core Saw.
That's the real beauty of efficiency at work with roller racking!
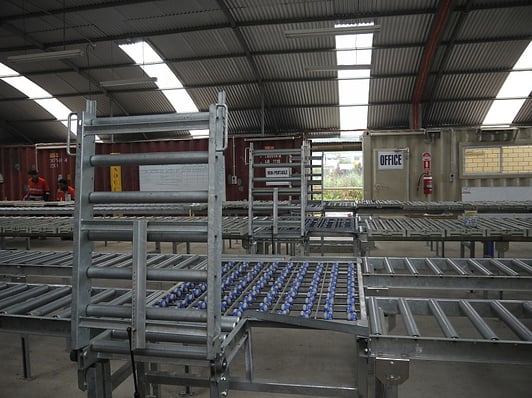
Other mines have a preference to have a zero curve system, like the job we recently completed for Regis Resources, below.
From their core logging shed, right through to the external core cutting facility it shows the racking joining at 90° angles.
There is no exact right or wrong, just a decision of what's right for you.
Utilise the space you have, as the curves do need more space in your facility.
Before you decide on this, read the next two sections!
Ball Transfer Tables
Traditionally, Ball Transfer Tables were the only option if you wanted to create a 90° join and have the ability to 'spin' the tray at T-junctions in the roller table.
However, unless you regularly spray DW40 on the ball bearings, these do have a tendency to 'foul-up' in the dirty environments on a mine site within weeks/months.
It's just more time and maintenance.
The solution?
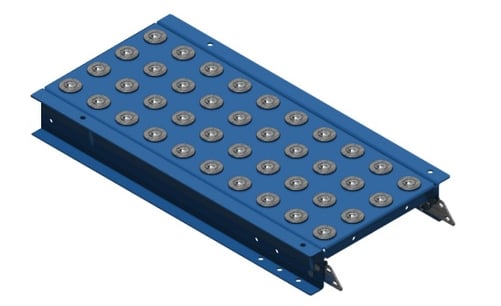
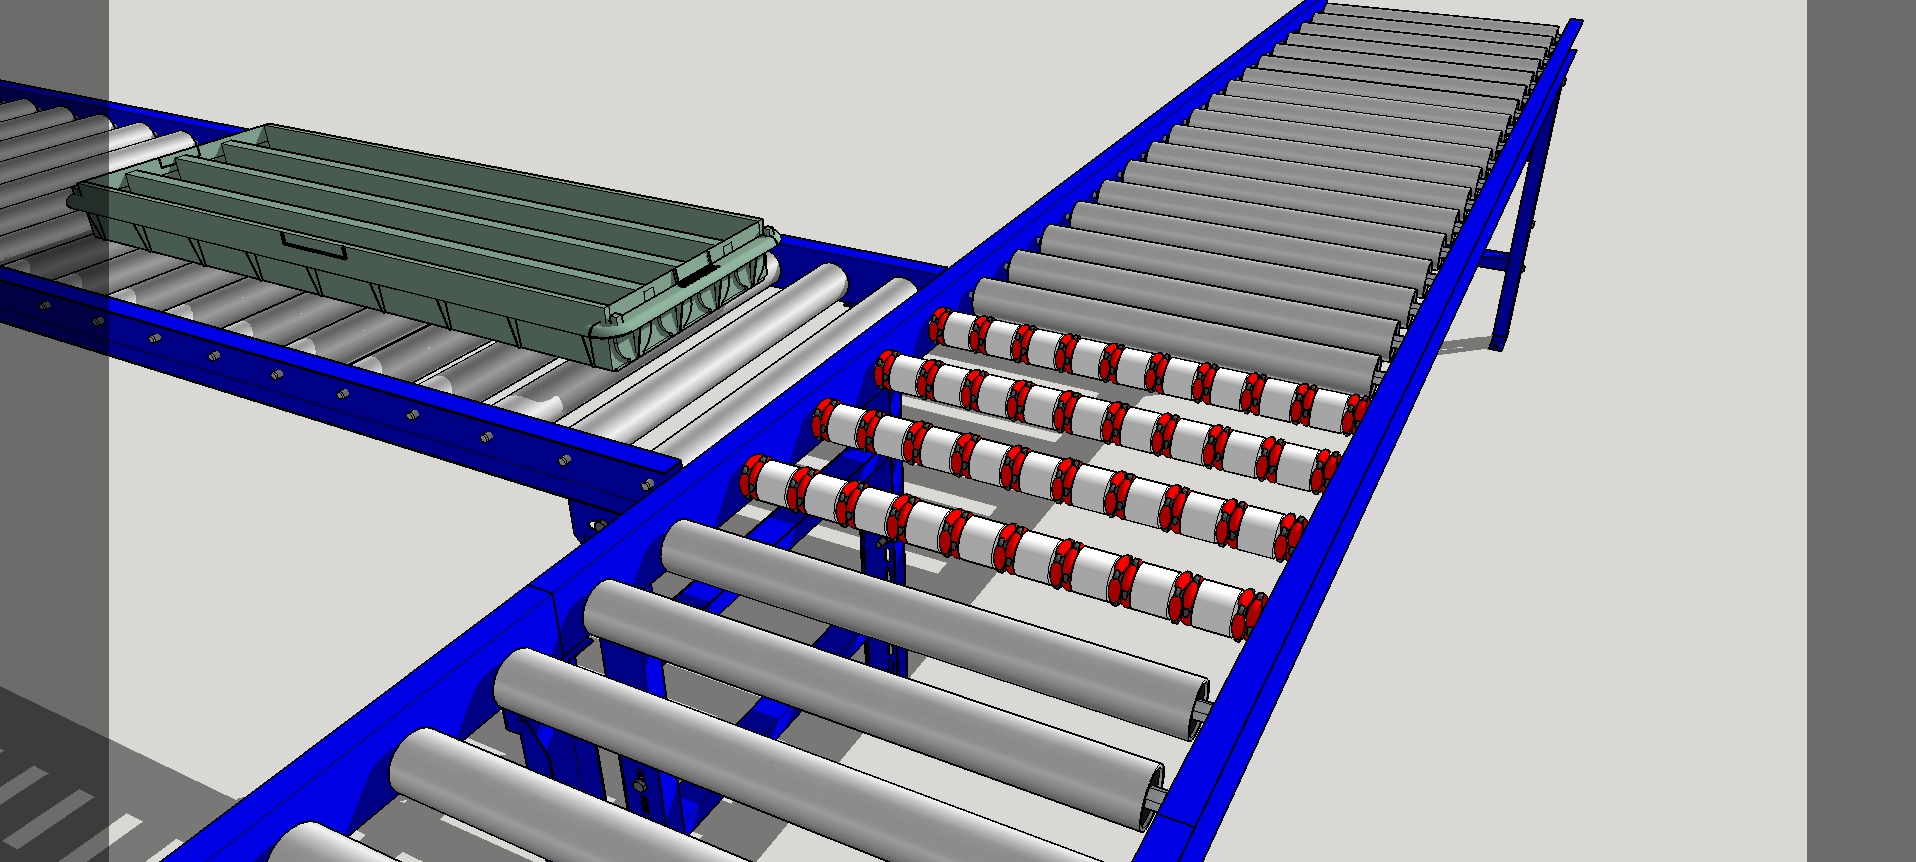
Omni Wheel Roller Inserts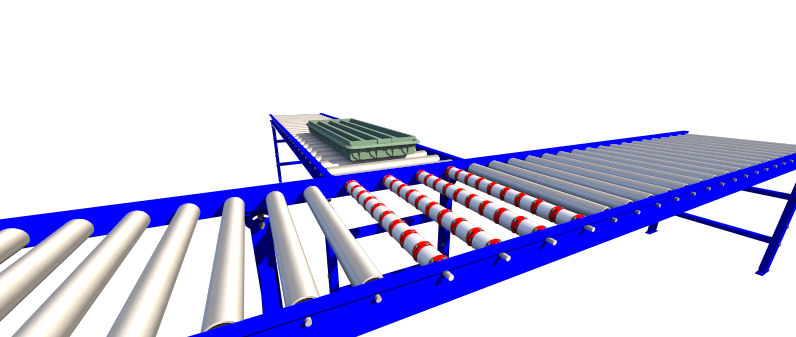
To overcome ball bearings 'fouling-up', Dynamics has created an 'Omni Wheel Roller Insert' solution.
These are made of an impact resistance plastic, that simply doesn't foul up and is cleaned with a standard watering hose.
These Omni Rollers replace the standard Zinc Steel Rollers in the racking and can even be retrofitted.
Using these at sections where one rack joins another at 90° essentially eliminates the need for curves.
Pallet Lift 360° Turn Tables
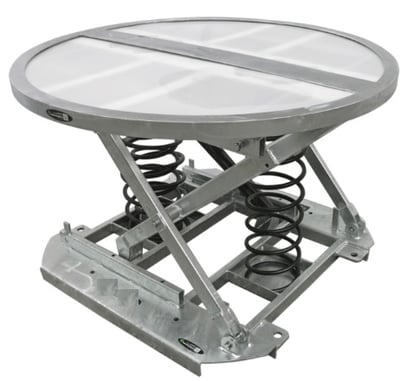
The main benefit of a pallet lift turn table is that what was previously a two person job becomes a one person job.
You can park this up at the entry & exits points of your racks, dump a pallet of trays and drive off in the forklift.
The pallet lift table can be set to the perfect height for a single person to slide trays straight from the pallet onto the racking, without any major lifting involved.
Eliminate back breaking lifts.
As you unload the trays the pallet lift will raise itself, keeping at the consistent optimal height.
Originally people thought these were an optional extra, but do the sums yourself.
If you can save someone's back (replacement backs are hard to find and priceless!) or redeploy a person from this part of the process and reduce LTI's on site, wouldn't you?
Conveyor Gate with Air Hinge
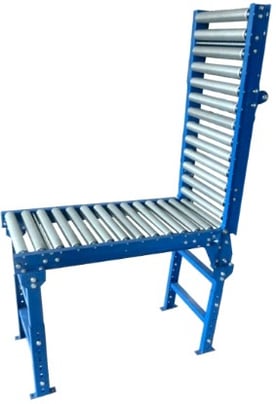
From end to end this unit is 2m in length; the gate is 1m and the fixed section 1m.
This is the best way to provide exit routes from the end of the logging tables where you would otherwise have the 'takeaway' section shut off one end of the aisle.
They can also be used halfway up or at the end of 'logging runs' where it joins the 'takeaway run' to eliminate the long walk around. Gate example below is for a job we supplied to Morobe JV, PNG.
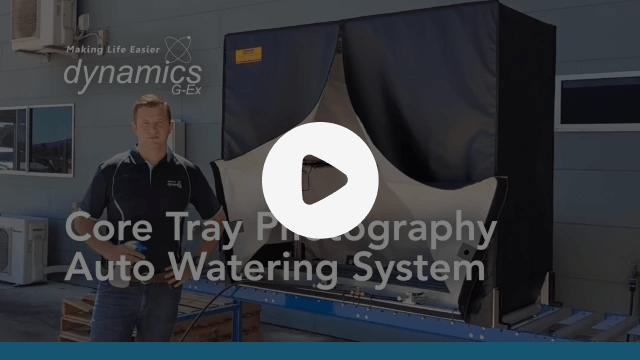
Core Tray Photography Stations
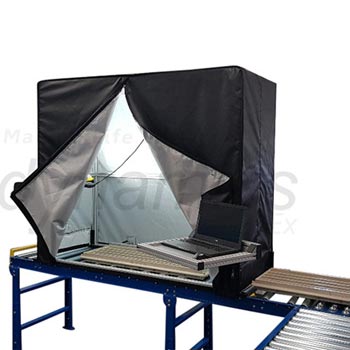
These are another uniquely designed Dynamics product.
For those serious about their core tray photography, this is a vital part of any professional set-up.
This is a Fixed Core Tray Photography Station, meaning that it bolts onto the C channel frame, and even in the windiest of core sheds, it's perfectly stable.
There is also the Portable version, which might be more suitable if your core photography involves moving the frame from one tray to the next along your racking.
Most mines will have this unit on the single 'takeaway' run, out of the logging shed, before the trays are fed into the core cutting area.
Or if the budget allows, some of the world class set-ups have these at the end of every logging run, for ultimate efficiency.
Core Orientation Logging Trolley
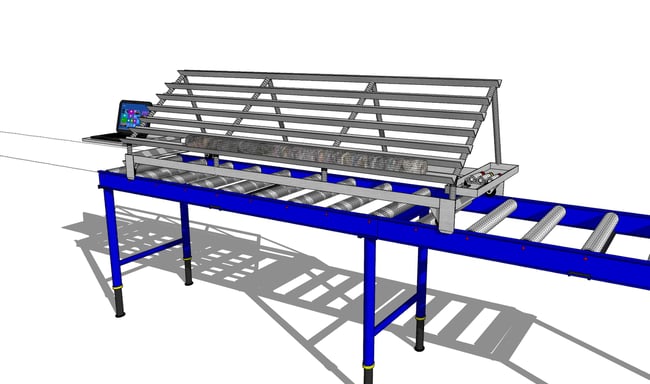
Logging core can be a back-breaking task if you are leaning over a core tray all day!
The purpose of the Tiered Core Logging Trolley is to be able to lay out the core in an easy to view and easy to align the core as it is downhole.
With its long straight angles for holding the core, you can view and log up to 18m of core.
The Logging Trolley can easily be moved along the core racking with enough height to clear the tray on the racking.
It's made of lightweight aluminum so it can be shifted from one row to another with ease.
Other options can be added like a tray for your marking up pens or a laptop tray.
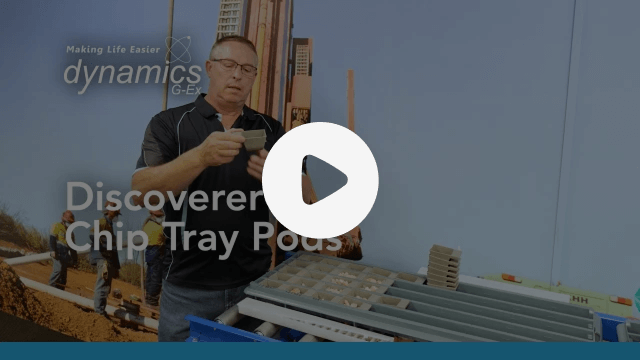
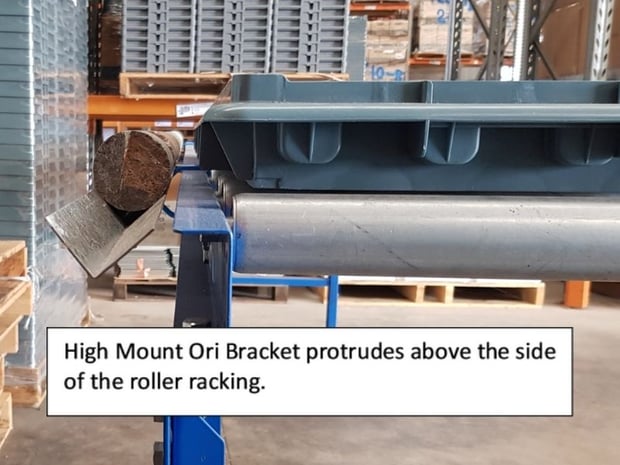
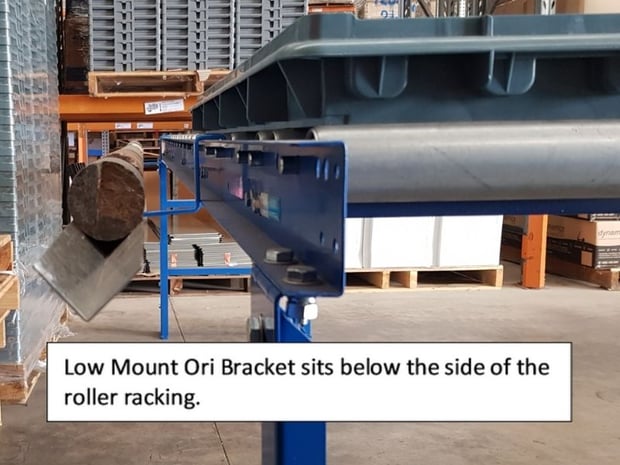
However, if you want something a little more simple, the other option is the Discoverer® Ori Angle Bracket System which is an effective solution for piecing together and marking up drill core samples.
Both low mount and high mount versions are compatible with our wide range of roller racking, so there's the added convenience of your core tray staying within reach for easy access.
Specific Gravity Weighing Station
It could be a pain measuring the specific gravity -- SG for short or bulk density to some -- of your core specimens.
But it cannot be denied that specific gravity is one of the most constant and quantifiable properties of a gem or mineral.
Should you ever need to identify an unknown stone, the specific gravity can narrow down your search to just a handful of possibilities if you have it.
You'd be glad to know you can now easily and accurately get SG measurements, either with a manual or an automatic specific gravity weighing station.
Conveyor End Stops
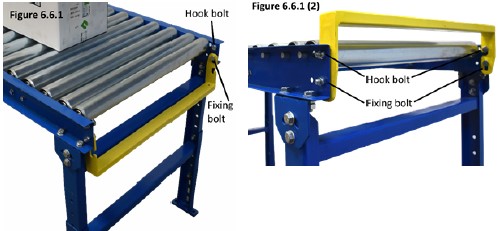
These End Stops can be used for areas where you are pushing core trays right to the end of a rack.
Now you can stop the trays without the need for human intervention.
These can be dropped down or fixed up, as shown above, according to what your requirements may be.
There is one other customisation that's worth mentioning: The guide rails.
If you are pushing a number of trays along the racking and around a curve, these guide rails will ensure the tray doesn't fall off at the corner.
So that covers the standard components.
What's next?
Part 2: Core Tray Workflow in the Core Shed
What is the best workflow for core trays on roller racking? This is probably one of the questions we get asked the most.
Here's what you need to know and should look out for:
1. The best practise is to have your Core Saw at the very end of the workflow.
a. Either in a smaller shed off to the side
b. Inside an Insulated Core Cutting Container
c. By building a noise and dust proof area within the existing shed with cold room panels
Each of these options should have a roller racking feed line into them.
Just don't put your Core Saw inside the same shed without a form of noise protection, as the constant noise will irritate those in the logging shed.
Keep it separate and air conditioned for optimal operator efficiency.
Additionally, make sure that wherever you park your Core Saw that it's not entirely 'boxed in' by roller racking. This will need occasional maintenance from the manufacturer and you don't want to pull your roller racking apart to remove it from the shed.
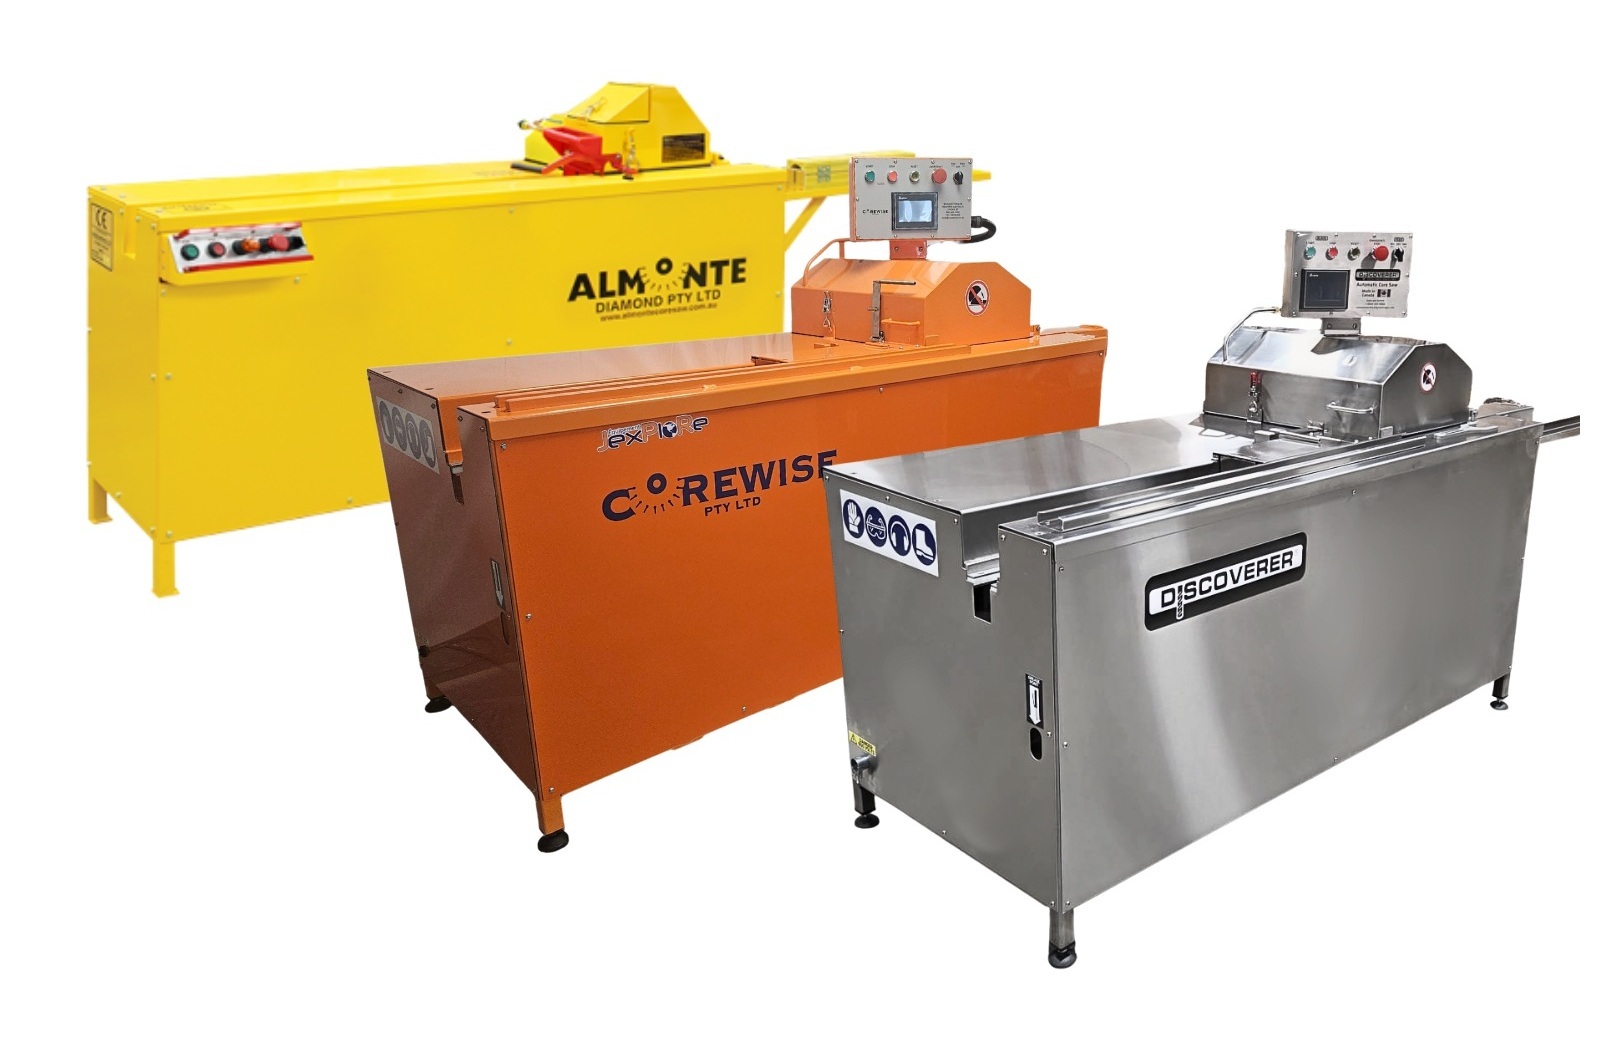
Most mine sites and larger exploration program will utilise an Automatic Core Saw for cutting large amounts of core. In cases where core cutting isn't so extensive, you can always opt for any of the Manual Core Saws which would do the job well, with the added bonus of being smaller and taking up lesser space than their automatic variations.
2. Your fixed core photography unit should also be situated on the exit run from the core logging area.
Should you decide to invest in multiple photography frames, then they can be situated at the end of each logging run. But this may be overkill dependent on the core photography volumes you have.
3. More than likely your manager will want to know how many metres of core the system you're presenting can handle.
a. Our advice is to present both options: Core Trays being logged parallel and perpendicular to the racking.
b. Calculate the length of your logging runs in metres.
c. Trays parallel calculation is:
Total length in metres ÷ 1.065m = Total No. of Tray Capacity. For NQ ÷ 5, HQ ÷ 4 & PQ ÷ 3 to get final metres of core on racks at one time.
d. Trays perpendicular calculation is:
Total length in metres ÷ 0.385m = Total No. of Tray Capacity. For NQ ÷ 5, HQ ÷ 4 & PQ ÷ 3 to get final metres of core on racks at one time.
Example:
30m of logging run.
Trays running perpendicular
Mostly drilling NQ(2)
30m ÷ 0.385 = 78 Trays. 78 x 5 (metres per tray) = 390m NQ
These calculations are based on a Discoverer Core Tray which is 1065 x 385mm outside dimensions.
Once you have this info, depending on budget and manager discretion, they'll decide if they want to increase to log multiple drill holes at once.
Ideally make sure you have enough racking for the longest hole you'll ever drill; it's a pain otherwise.
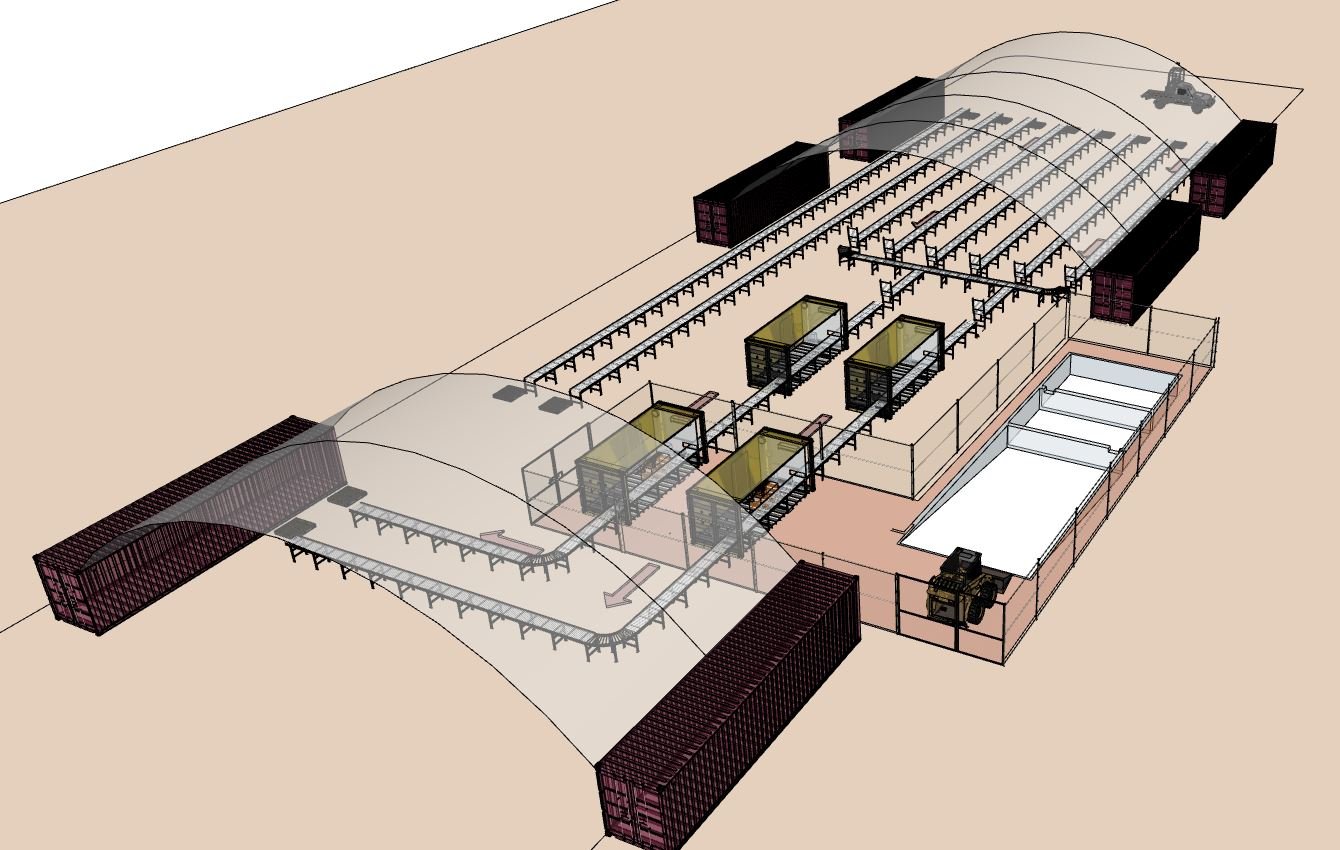
Video Walk-Through Core Shed Design
After we've got your drawings and confirmation on your quantities we'll produce a professional walk-through video.
It's as close as you'll get to seeing it in real life!
The process will also assist you in getting quick and easy sign-off from your management team.
Here's an example:
Part 3: Roller Racking Set-Up & Installation Helpful Tips
Roller Racking Set-Up Helpful Tips
-
The Aisle Gap that works well would be between 1.5 to 2.4m. Also ensure you've got room around the perimeter of the racking to fit forklifts and the like.
-
Calculate how many trays you can fit on your logging area.
Rolling Trays parallel with racking you'll fit 3 trays per 3-metre section.
Rolling Trays perpendicular to racking you'll fit 7 trays per 3 metres (based on 385mm wide Plastic Core Tray)
Will there be enough racking for the maximum amount of trays you'll want to log at one time? Have you considered for future expansion of your project?
-
Are you using a 'Flat-Bottom' Core Tray that will roll smoothly on roller racking? Discoverer® 3 & Discoverer® 4 Core Trays are designed for this.
Roller Racking Installation
So how easy is this system to put together?
Firstly all the bolts and fixings are supplied with the system. All bolts are high tensile zinc bolts.
To fix it to a concrete floor you simply put a dyna bolt through the holes in the base of the Support Legs.
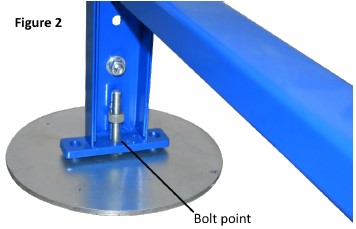
However you don't have to invest in a concrete floor to make the roller racking work.
If you've got is a compacted blue metal/gravel/hardstand area, let us know right upfront and we'll supply you with the Adjustable Feet Plate Assembly, shown below.
It's perfectly stable and can save you a few thousand in concreting.
Apart from that 95% of mine sites find the entire installation very easy to complete themselves.
We supply a complete installation manual with the system.
We can offer installation if it's a requirement, but utilising your onsite staff will be the most cost effective way.
We can support your team with video chat at any time required.
Thought Provoking Questions
Considering each system is different and your Core Shed design will be unique to you, there are still important questions to make sure you've got covered, or can ask us for help with.
- How can I get a single hole to the saw without another hole getting in the way, through the whole process?
- How can I stop bottlenecks? Examples:
- Not enough sampling length of roller racking exiting from the Core Saw. Six metres past the saw is preferred.
- The core photography station at the wrong spot. Recommend this is on the exit takeaway from the logging area to the core cutting area.
- Not enough logging runs coming in. Make sure you have enough logging runs.
- Is the floor flat and facility on a single level? This is especially important to consider when the roller racking is feeding into a Core Cutting Container, as the container floor is always raised. Most of the time this is solved by having the container off the edge of the concrete shed slab, or the ground lowered to accommodate, if sitting on the dirt.
- Have you considered Anti-Fatigue matting? Here's a good case study to read.
Steel Shed Structure v Dome Shelter
This is a good debate, and there's no exact right or wrong.
If you feel strongly a steel shed structure for your Core Shed is the only way to go, then that's fine.
But we want to create awareness around 'Dome Shelters'.
These are High Quality Fabric Structures (10-year warranty) that are UV resistant & cyclone rated, easy to install and entirely mobile to be moved from one site to another if the need arises.
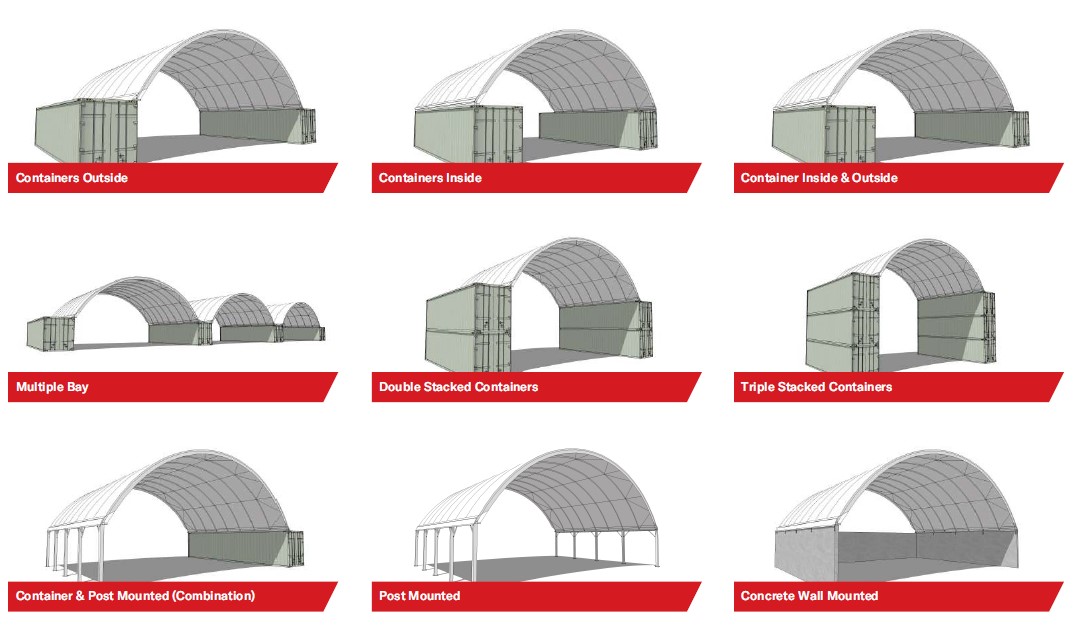
They either bridge two containers (can be the container they are shipped in), post mounted or even concrete wall mounted for something a little more permanent.
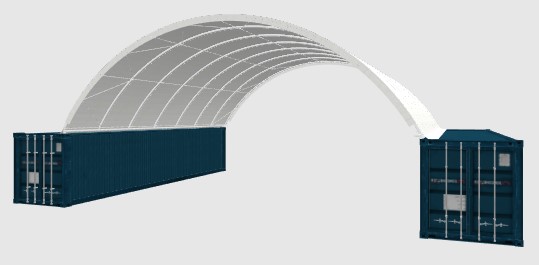
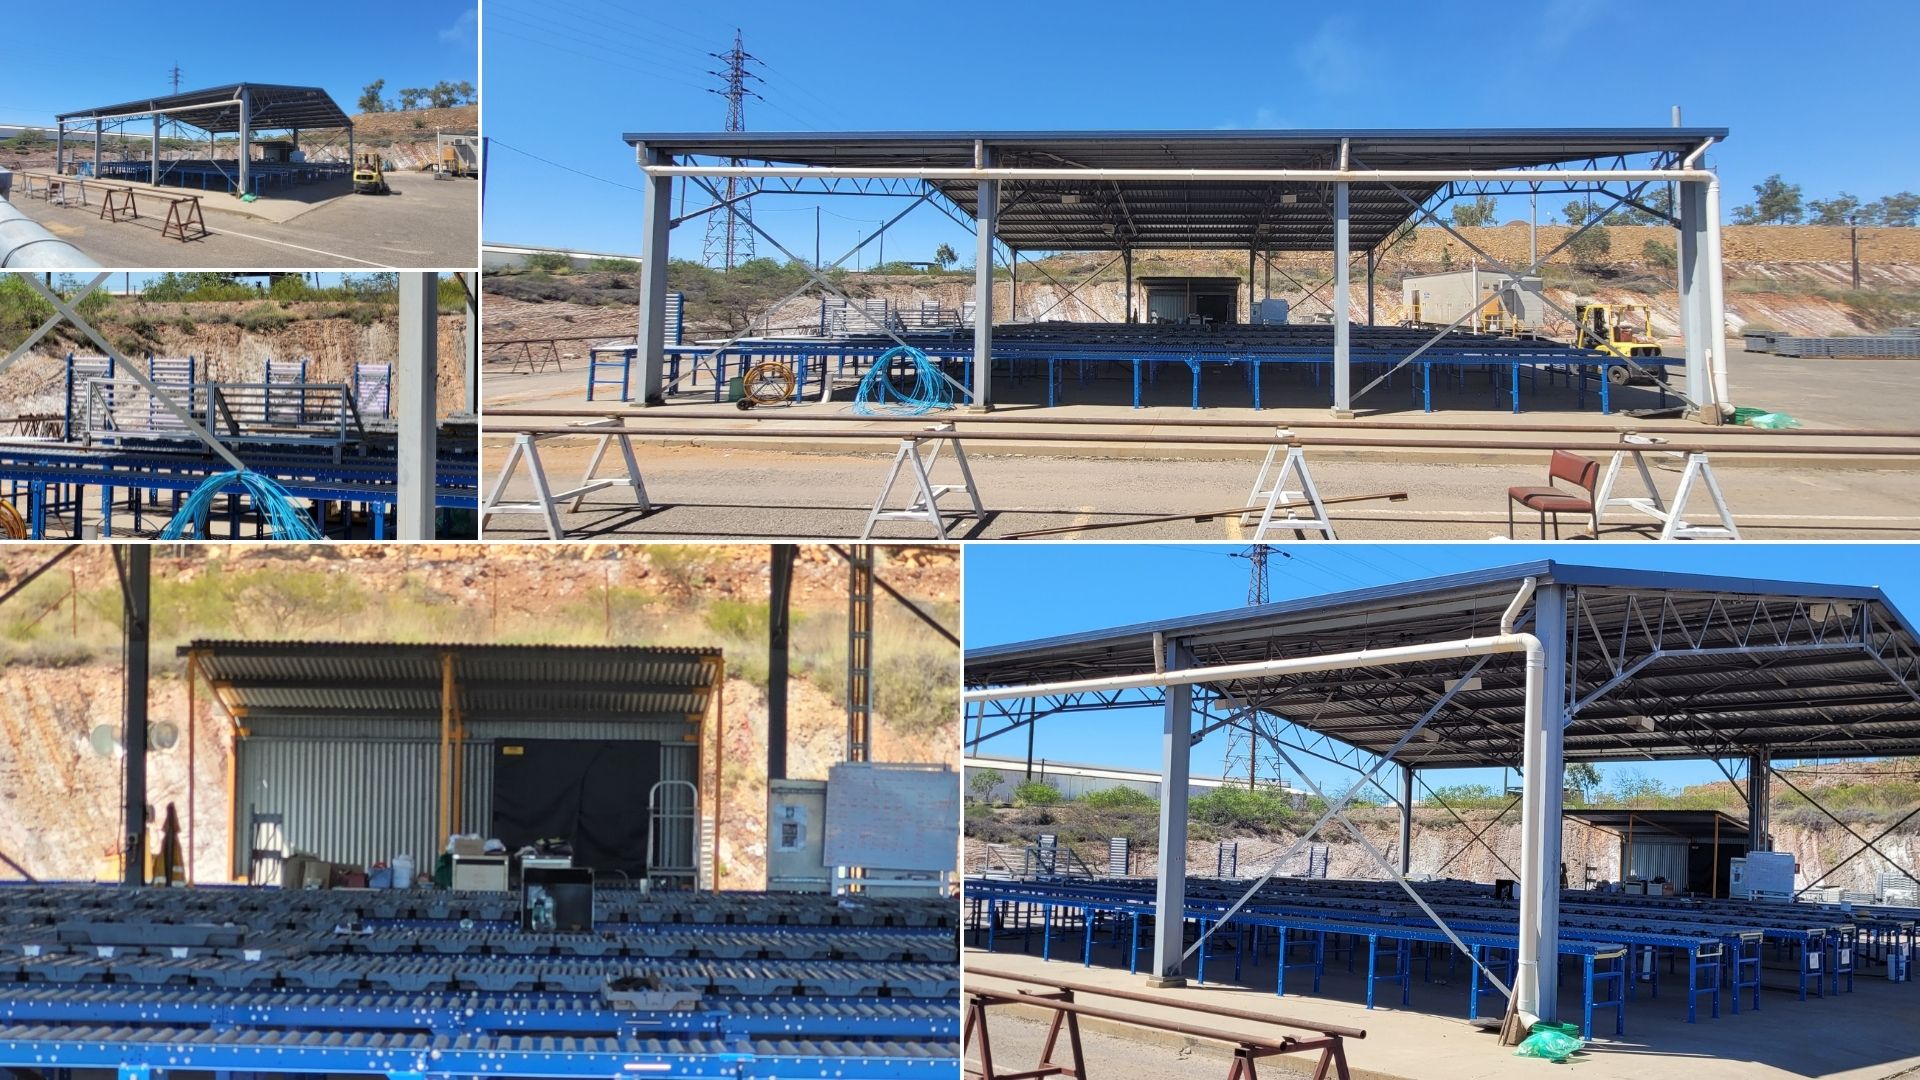
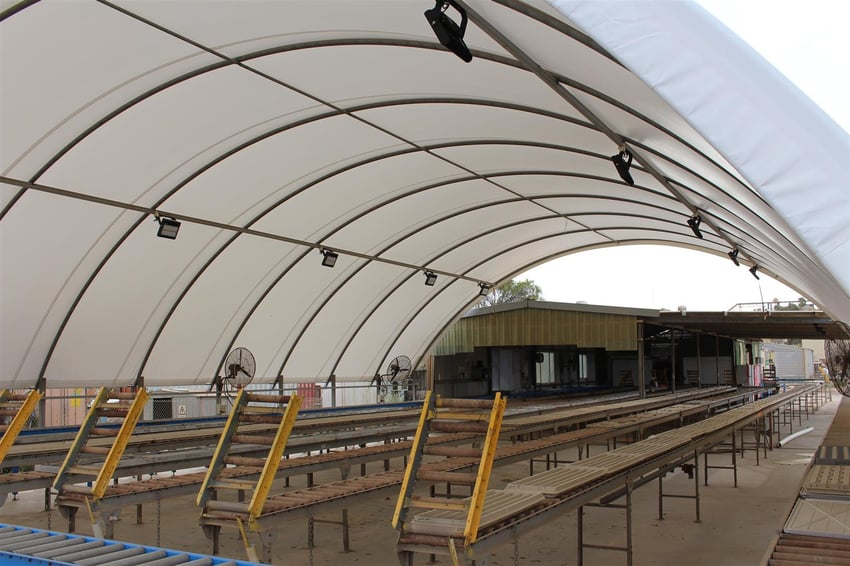
Check out the picture gallery of Core Shed Applications for the Dome Shelter below.
Fully equipped Core Shed. Although we didn't supply this roller racking, this is to illustrate the Dome Shelter from a client using the Discoverer Core Trays.
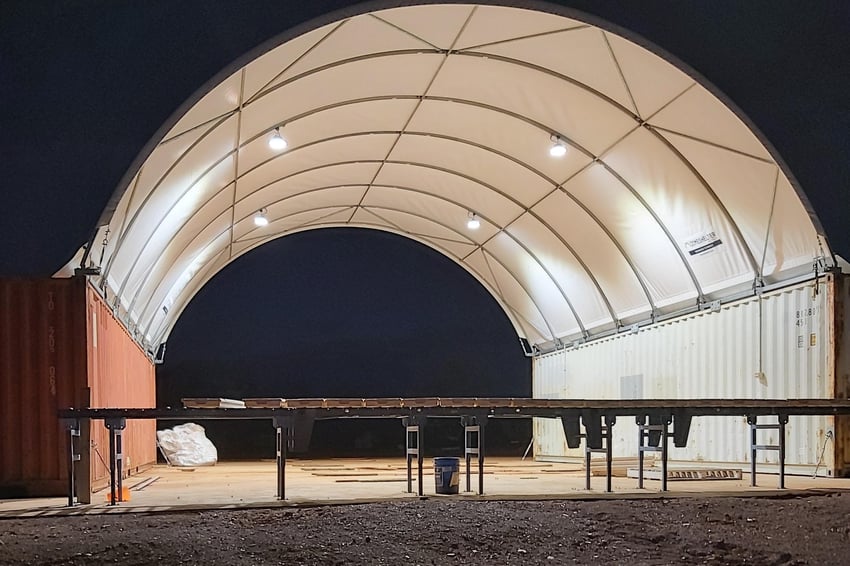
Setting up a new Dome Shelter Core Shed at night. Lots of light and nice working conditions.
Standard sizes start at 6m span width, and then goes to 8m, 10m, 12m, 15m, 17m, 21m, 23m, 25m right to 30m span width.
The length of the Core Shed is customisable too.
Either by placing 20 or 40ft containers end to end, for as long as you desire, or mounting posts along the desired length.
So you may be wondering what does a Dome Shelter cost v Steel Structure Shed?
Perception is that these would be considerably cheaper, but that's not entirely the case.
These units start at around $5,100+GST for a 6m span x 6.05 length, and go right up to around the $18,000- $23,000+GST range, dependent on the wind rating needed, for the 17m span x 12.2m length.
However if the benefits outweigh a typical steel structure shed, this could be the solution for you.
Main Benefits for Mine Sites
- A Dome Shelter is classified as a temporary structure and therefore often do not need council approval. Every council differs in regulations and any queries on such matters should be directed to your relevant authority.
- Ease and speed of supplying, erecting and mobility of the structure is considerably higher than a steel structure. (2-3 man team, 10 hours)
So if you are liking the look of these options, we have a couple of choices for you.
- We partner with Australia's leading Dome Shelter specialists and we can put you in touch with them directly.
- If you are looking for an entirely turnkey solution and only want to place one purchase order, at the same time as supplying your Core Shed Roller Racking system, we can also supply the Dome Shelter system. Finally we can provide the Installation Team for the entire system too if you wish.
Ok, so back to the roller racking set-up, what's your next step?
To get started, here's what you should act on today:
First thing is to take measurements of the onsite footprint area that your racking design will be located.
Be sure to measure twice, saves a lot of headache!
Then send us a plan.
Could be the original shed drawings (which have measurements).
Or if it's going to be 'the space between the containers' or similar then keep it simple and shoot us a sketch.
We've had situations where we couldn't compete; and weren't sure why, however when they got to site the clients realised that components are missing.
To ensure this never happens on our jobs, we'll do an accurate take-off for you from the drawings. Like for like we can easily compete with anyone budget-wise.
If you make a mistake it's normally an expensive mistake, or lost productivity.
And the project will be inspected by everyone, so you can't hide it.
Our aim is to get your management team and colleagues telling you, 'great work, you knew what you were doing!'
Submit it to the Core Shed Design team on the link below.

What do I expect next?
OK, plan submitted.
After a 30-min get together internally, you can expect a call from one of our Geological Product Specialists.
The reason for this call is to ensure we truly understand your needs, deadlines and what's important to you.
Then we can make what's important to you happen.
Well that's just about wraps everything up from us!
We'd love to assist you with your next Core Shed or Core Shack Design, so reach out to our team of Core Shed Design Specialists today for a free, no-obligation audit, drawings and costings.
We hope you've found this article beneficial. Talk soon!
P.S. If you want to do further reading, check out this article where we talk about a couple of Core Yard designs.
Spencer Dormer
My goal is to empower Geologists & Field Techs to make more informed decisions through providing unbiased and insightful thought leadership for the industry worldwide.